How to make authentic Indian curry step by step
The first time someone showed me how to make a real curry, I was sure they had skipped a step. There was no curry powder in sight, no jar, no shortcut. Just whole spices hitting hot fat, and a room that started smelling like something I couldn't buy anywhere. That was the moment I understood: authentic Indian curry is a technique, not a recipe. And once you learn the sequence, you can make it with almost anything in your fridge.
Most recipes you'll find online hand you a list of ingredients and hope for the best. Very few explain why the order matters, what "done" actually looks like, or how to fix it when something goes wrong halfway through. That's the gap I want to close here. What follows is the working method I use now, refined through a lot of burnt onions and a couple of curries that were frankly inedible.
Key takeaways
- The base is always the same three moves: fat, aromatics, spices. Get the sequence right and the rest is flexible.
- Blooming ground spices in hot fat for 30-60 seconds is what separates a fragrant curry from a dusty one.
- You know the base is ready when the oil separates and pools at the edges of the pan.
- Salt early, taste often, and finish with a tadka: a spoon of hot ghee poured over the top at the very end.
- Nearly every mistake (too salty, too sour, too thin) has a fast fix, and none of them require starting over.
What actually makes a curry authentic (hint: it isn't the powder)
Here's an unpopular opinion I'll defend to the end: the word "curry" is doing almost no work. In India, it isn't one dish. It's a category as broad as "stew" is in the West, and what a family in Kerala cooks on a Tuesday shares almost nothing with a Sunday dish in Punjab beyond a few structural habits.
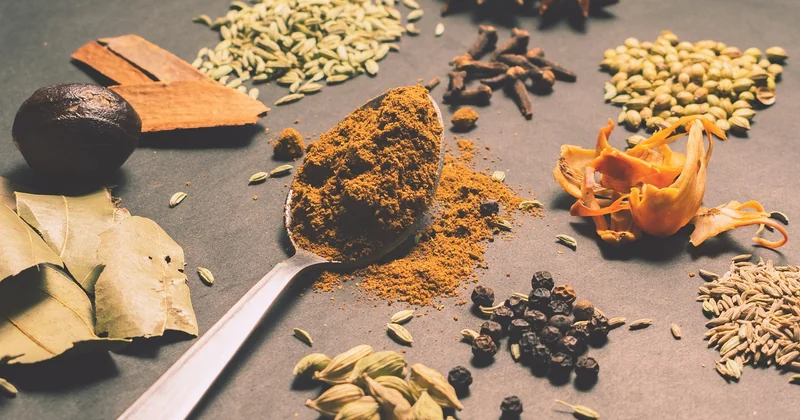
So when people ask how to make "an authentic curry," the honest answer is that authenticity lives in the process, not the ingredient list. Two cooks can use identical spices and produce wildly different results, because one bloomed them properly and the other tossed them into a watery pan at the wrong moment.
Understand the "north Indian default" you're probably cooking
Most recipes published in English lean heavily on a north Indian template: onion, tomato, ginger-garlic, a hot red chili powder, and garam masala. It's a great starting point, and it's what I'll teach here. Just know you're learning one dialect, not the whole language.
The techniques shift as you move around the country. In the south, you'll see mustard seeds, curry leaves, and coconut far more often than tomato. Bengali cooking leans on panch phoron, a five-spice blend used whole, and mustard oil. Goan curries bring in vinegar and coconut. Same principles underneath—fat, aromatics, spices, slow reduction—but the accents change completely.
Which is good news, because it means once you own the method, you can improvise forever.
Whole spices versus powder: the trade-off nobody explains
This is where I'll concede a nuance. Freshly toasted whole spices, ground at home, taste noticeably better than anything from a jar. There's no debate about that.
But here's the catch: it's slower, and a poorly toasted seed turns bitter fast. When I first tried grinding my own garam masala, I scorched the cumin twice before I learned to pull the pan off the heat before the seeds looked ready. They keep cooking in the residual heat. That lesson cost me two batches and a lot of ventilation.
My working compromise: whole spices for the blooming stage, where they're visible and easy to control, and a good-quality ground blend for the finishing dust. It's not maximally purist. It works, and it's the version I actually cook on a weeknight.
The step-by-step method: how to cook chicken curry from scratch
The sequence below is what I'd hand a friend who'd never done this before. Everything else—the exact spices, the heat level, the protein—is adjustable.
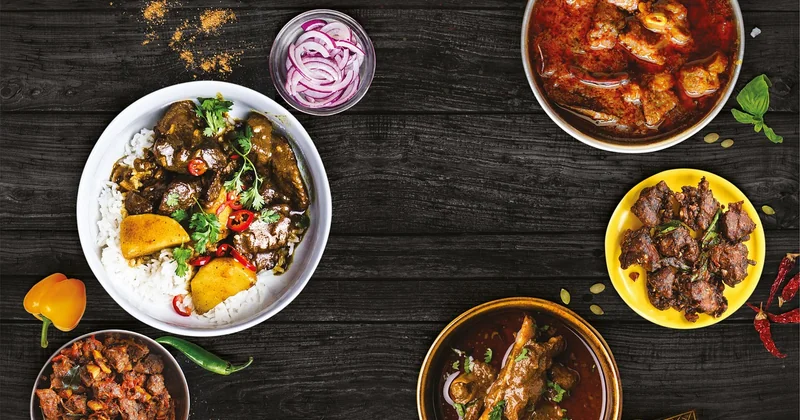
Step 1: Prepare the aromatics before anything touches the pan
You need a fine dice on one large onion, roughly equal volumes of ginger and garlic grated into a paste, and your spices measured out into small bowls. This matters more than it sounds. Ground spices burn in seconds, and if you're still chopping when the pan is hot, you'll lose the whole batch.
I keep a small plate ready with the ground spices already mixed: turmeric, red chili powder, coriander, a pinch of cumin. That plate is your insurance policy.
Step 2: Bloom the whole spices in fat
Heat two to three tablespoons of oil or ghee over medium heat—not high. Add cumin seeds and let them sizzle until they darken slightly and start to pop. Add a couple of bruised cardamom pods, a bay leaf, a small piece of cinnamon bark, and whole cloves if you like them.
Thirty seconds is usually enough. You'll know you're there when the smell changes from "warm oil" to something sharp and fragrant.
Step 3: Cook the onions to the right colour, not the fastest colour
Add the diced onion with a pinch of salt. Salt draws out moisture and speeds up browning, which is the point.
Now the part that trips up almost everyone: you're going for a deep, golden brown, and that genuinely takes 8-12 minutes on medium heat. Not five minutes on high. High heat gives you burnt edges and a raw-tasting centre, and no amount of spice will cover that up.
Stir every minute or so. If the onions are catching, add a splash of water and scrape the bottom—that brown layer is flavour, not failure.
Step 4: Add ginger-garlic, then the ground spices
Once the onions are properly browned, drop the heat to low and add the ginger-garlic paste. Cook it for about a minute until the raw smell disappears. This step is non-negotiable; raw ginger-garlic paste tastes aggressive and slightly metallic in the finished dish.
Now add your pre-mixed ground spices. Stir constantly for 30 to 60 seconds. This is the blooming stage, and it's short for a reason. The spices need heat to release their oils, but they go from fragrant to acrid in under a minute. If the pan looks dry, add a tablespoon of water to stop them scorching.
Step 5: Build the gravy with tomato and let it reduce
Add chopped tomatoes—two or three medium ones, or a couple of tablespoons of paste if you're out. Cook them down until they collapse and the mixture thickens into something you could almost spread on bread. This is the bhuna, the reduction stage, and it's where the depth comes from.
How long? Anywhere from 8 to 15 minutes, depending on your tomatoes. You'll see the oil start to separate and pool in shiny spots at the edges of the pan. That visual cue is more reliable than any timer.
Step 6: Add the protein and the liquid
Stir in your chicken pieces and turn them in the base until every piece is coated and the outside has gone from pink to pale. Then add liquid—water, stock, or a mix of water and yogurt—just enough to come about two-thirds of the way up the meat.
Bring it to a gentle simmer, cover, and cook for 20 to 25 minutes for bone-in pieces, closer to 15 for boneless thigh or breast. Bone-in takes longer but gives you a noticeably richer sauce, because the marrow and collagen go into the liquid. I use bone-in unless I'm in a genuine hurry.
Step 7: Finish with a tadka and rest before serving
This is the step almost no recipe mentions, and it's the one that makes people ask what you did differently.
In a small pan, heat a tablespoon of ghee until it's shimmering. Add mustard seeds and let them pop, then a few curry leaves if you have them—they'll crackle loudly and smell extraordinary. Pour the whole thing over the finished curry, stir once, cover, and let it sit off the heat for 5 minutes.
That final hot-fat pour carries aromatics straight to the surface instead of cooking them into oblivion. It's the difference between a spiced stew and a curry.
A quick comparison: home-style versus restaurant-style
People often tell me their curry never tastes like the takeaway version. It usually won't, and that's not a failure on your part. They're built differently on purpose.
| Element | Home-style curry | Restaurant-style curry |
|---|---|---|
| Base | Fresh onions, tomatoes, slow reduction | Pre-made base gravy, reheated per order |
| Fat | Moderate, often ghee or mustard oil | Heavier, plus cream or a nut paste finish |
| Spice layering | Whole spices bloomed at the start, tadka at the end | Blended masala paste, adjusted for consistency |
| Texture | Thicker, uneven, sometimes grainy | Silky and uniform |
| Time | 45-70 minutes end to end | Minutes, because the work is done in advance |
The restaurant version isn't cheating. It's a different production model. But the home method gives you something the takeaway can't: control over the spice balance, and no mystery about what's in it.
Fixing a curry that went wrong
Something always goes slightly sideways. Here's what I do, based on the mistakes I've actually made.
- Too salty: add a peeled chunk of potato, simmer for ten minutes, then remove it. Or stir in a spoon of plain yogurt.
- Too sour or too sharp: a pinch of sugar, not more than half a teaspoon, and a splash of cream at the end.
- Too thin: uncover and simmer, or mash a few of the cooked onion pieces against the side of the pan.
- Burnt at the bottom: do not scrape it. Transfer the curry to a new pan without touching the burnt layer, and add a little water to the new pan.
- Flat and muddled: you almost certainly undercooked the onions or the tomato base. Finish with a tadka and a squeeze of lemon, and give it five more minutes.
None of these require throwing anything away. Which brings me to a habit worth building: taste at every stage. Not just at the end. The curry tells you what it needs long before it's finished, and the sooner you listen, the less you have to fix later.
Scaling up and storing it properly
A curry made for four reheats better than almost anything else in the kitchen. The spices keep integrating overnight, and honestly, day-two curry is frequently better than day-one.
Cool it uncovered for about twenty minutes, then refrigerate in a shallow container. It keeps for three to four days. Reheat gently on the stovetop with a splash of water rather than blasting it in a microwave, which separates the fat and leaves you with a grainy sauce.
Freezing works, but the texture of the meat suffers a little, especially with chicken breast. Thigh holds up far better if you're cooking specifically to freeze.
The part that matters most
If you take one thing from all of this, make it the blooming stage. That thirty to sixty seconds of ground spices hitting hot fat is where most of the flavour in your curry is decided, and it's the step most recipes bury in a single line.
The rest—the exact spices, the protein, the heat level—you'll adjust for years. My own version has drifted a long way from where I started. Less chili than I used to use. More cardamom. A stubborn refusal to skip the tadka, even when I'm tired and it's late.
Cook it badly once. Then cook it again next week and notice what changed. That's genuinely how this gets learned, and there's no shortcut that tastes as good.